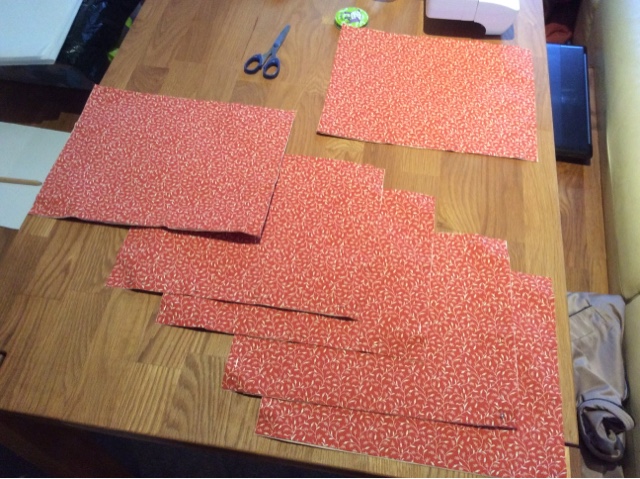
I started with the skirt. I cut out four rectangular panels (same size as a n Evening Standard, as that was my pattern piece!) and four triangles.

The triangles would form "godets" in the skirt, adding volume and boosting the swishiness factor. They are inserted between the rectangles.

The fabric is the same I used on my curtain-making last year, and it frays quite a lot. I used the overlocker to oversew all the raw edges inside the skirt. This was my first time using the overlocker, so it took me a while (c.2hrs!) to get it thread up properly with the right tension.

Once all the pieces were together, I had to deal with the uneven bottom edge (think Pythagoras and hypotenuses...) but after that, the skirt was pretty much complete. Anything non-fitted is pretty much always easier to put together.

As such, the rest of the blog is pretty much dedicated to the fitted bodice of the dress.
I knew I wanted a pleated, decorative waistband, so I cut a rectangle that was taller than the final band would be, and then pinned it, ironed it and sewed it into pleated horizontal lines. I then overlocked all four edges. Because overlocking is cool.

I used an existing dress with a similarly shaped bodice and traced round the parts onto my "pattern paper" - yes, it does look a lot like newspaper... I dedicate most of my pattern pieces to London's free papers.

Then I cut out enough of these for the outer and lining of the bodice - two of the large pieces, and four of each of the smaller ones. You could use a different colour or type of fabric for the lining, if you wanted, but I had enough red fabric to do it all in the same colour.


First, I straight-stitched the central piece to the sides. In the above picture, that is the lined-up, overlocked edges. This involved carefully easing the pieces together, especially around the curves. Sewing curves isn't quite as simple as straight lines, but a good press afterwards really helps smooth out the seams. You do this for the outer and lining pieces, too.
I made the straps next. I cut two long, thin rectangles of red fabric. First, I straight-stitched then overlocked the long edge. Then I turned it the other way out (so the seam was on the inside) before ironing it flat. Then I added some edge stitching and decorative centre stitching.

Here's the Before and the After versions...

I lined up the top of the bodices for the outer and lining, and pinned the straps into place between the two pieces.

This is where we're at with all the different pieces of the bodice...

I stitched the neckline's of the outer and lining together next, and the attached the waistband to the outer piece. Turned out the right way and given a good press, it's starting to look like a real top!

This is the front of the bodice complete. The back was going to be made of two side panels, and a central piece of stretchy stocking done with shirring elastic (so it wouldn't need a zip).
I attached the side panels next, sewing them all together on their short edges, to make each side into one three-piece long, thin line, before sewing that to the main bodice. That's quite a clumsy description, and I didn't really take any photos of that part either, so all I have to show is the inside of the bodice once the side pieces had been attached and the seams overlocked. I do enjoy the neat symmetry...

This is what it looks like when turned the right way out (and pressed, of course!)

Now for the shirred elastic back! Smocking always takes a lot of time and patience, but at least with shirring elastic, it's fairly pain free, even if it is time costly.
I used shirring elastic in a few of my previous projects, to create waistbands. It's a great way of creating a "fitted" garment, without needing to put in a zip, or measure everything super-precisely. Or if you're the kind of person whose body shape changes, this has a degree of flexibility in fit.
First, you take a flat panel that is say... Twice the width that you want the final piece to be? Ish. Straight-stitch across the top like a hem, to create both a neat top edge, and also a channel through the which you will later feed some elastic.

Wind shirring elastic by hand onto your bobbin. Don't pull it too tight when doing this. Thread your top thread with thread that matches your fabric (yes, three "threads" in one sentence, but it does make sense...!)

Starting at one end of the piece of fabric, sew straight lines across the fabric. You have to pull it tight as you go, stretching out the stitching you've already sewn.

Keep going until you have done the whole piece! Mine involved about 38 horizontal lines of stitching!

Feed elastic into the top channel, cut it to length and sew down at the edges. I used the overlocker to trim all the edges of the elastic and thread ends in one go.

Then attach this back piece to the rest of the bodice by straight-stitching down the sides. Bring the straps over and sew them down.

I needed to add some last-minute darts on the front, to improve the fit around the bust.
The top of the skirt was (purposely!) bigger than the bottom of the bodice. This was so I could make it pleated. To attach the skirt, I sewed two lines of stitching around the top of the skirt, to create elasticated pleats. To make sure it was evenly spread around the bodice, I then pinned the skirt to the bodice at the sides, then middle of the front and back, then halfway between each of those points. This created eight even divisions of skirt around the bodice. I then straight-stitched this around, making sure to stretch out across the shirred elastic back! Then I attempted a blind hem on the bottom edge, which wasn't 100% invisible but...meh.
And here is the final dress!

I'm particularly pleased with the fitted bodice!

It took me an entire weekend to make this dress, but I am really pleased with the result! I'd like to experiment with different necklines and maybe a circle skirt next. But for now, I'm just going to swoosh around in this one!